0

Out of 0 Ratings

Owner's of the Bose Speaker Bose Virtually Invisible 191 Speakers gave it a score of 0 out of 5. Here's how the scores stacked up:
  • Reliability

    0 out of 5
  • Durability

    0 out of 5
  • Maintenance

    0 out of 5
  • Performance

    0 out of 5
  • Ease of Use

    0 out of 5
of 144
 
12

P
ROCEDIMIENTO DE INSTALACIÓN
EnglishEspañolNederlands DeutschItaliano
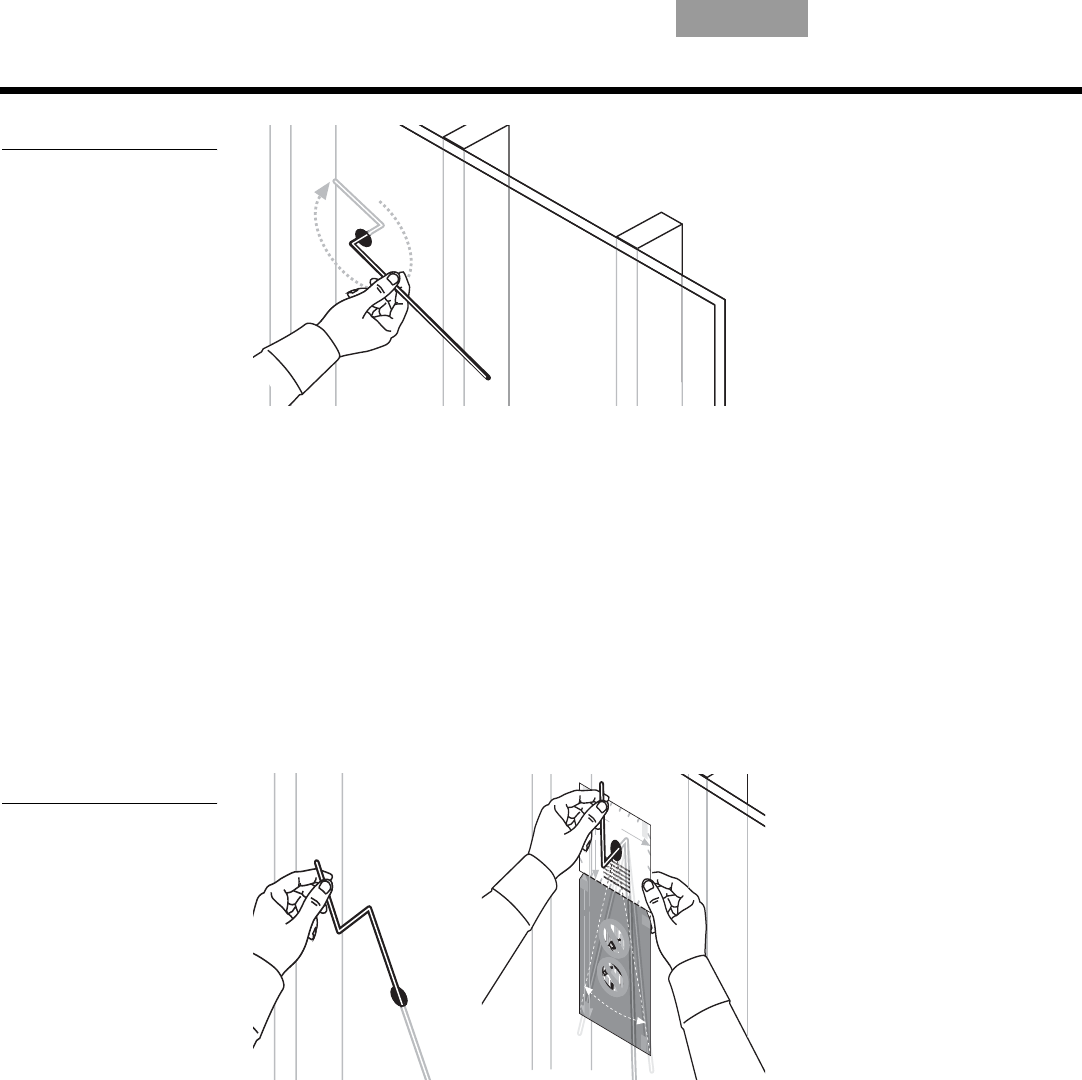
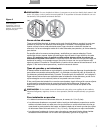
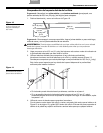
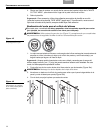
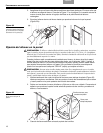
Figura 12
Comprobación del espacio
para la anchura del altavoz
Si el cable da el giro de 360° sin problemas, continúe en el paso 5.
Si no puede girar el cable, deberá taladrar otro orificio de prueba en cualquier otro
lugar. A continuación, repita los pasos 3 y 4.
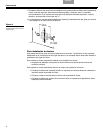
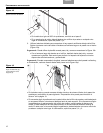
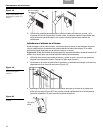
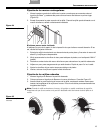
5. Utilice el alambre doblado para comprobar si hay espacio suficiente debajo del orificio:
Sujete el extremo corto del cable e introduzca el extremo largo en la pared o en el techo
(Figura 13a).
6XJHUHQFLDPuede utilizar la plantilla en este paso, tal y como se muestra en la Figura 13b.
Con el extremo largo del alambre en el orificio, deslícelo hacia abajo tal y como se
muestra en la plantilla. Esto servirá para indicar si el espacio de la pared o el techo
dispone de suficiente anchura y profundidad.
6XJHUHQFLDCuando compruebe la longitud, mueva el alambre cerca de la pared o el techo y,
a continuación, vuelva a moverlo hacia atrás (como en la Figura 13a).
Figura 13
Introducción del extremo
largo del alambre (a) y
comprobación de la
longitud (b)
Si el alambre entra y puede moverse de lado a lado en el extremo inferior de la pared sin
problemas, continúe en el paso siguiente: “Preparación de la pared para introducir el
altavoz” en la página 13.
Si encuentra algún impedimento en la parte inferior del orificio de prueba y está trabajando
en una pared interior, introduzca el alambre hacia la parte superior. Si no encuentra ningún
impedimento en la parte superior del orificio de prueba, puede instalar el altavoz más
arriba. Si está trabajando en una pared exterior, no se recomienda instalar el altavoz al
revés. En este caso, si encuentra algún impedimento, deberá taladrar un nuevo orificio de
prueba en cualquier otro lugar. A continuación, repita los pasos 3, 4 y 5.
360°
(a)
5
1
/
2
"
(
1
4
c
m
)
8
1
/
16
"
(
2
0
.5
c
m
)
1
4
1
/
2
"
(
36
.9
c
m
)
T
A
PE
HE
R
E
TAP
E
HE
R
E
T
A
P
E
HE
R
E
WHITE CUT OUT AREA
WHITE CUT OUT AREA
P
i
l
o
t
H
o
l
e
W
A
R
N
I
N
G
:
M
a
k
e
s
u
re
t
h
e
s
p
o
t
c
h
o
s
e
n
i
s
s
a
f
e
f
o
r
c
u
t
t
ing.
D
o
n
o
t
cu
t
t
h
ro
u
g
h
s
u
r
f
ac
e
st
h
a
t
h
a
v
e
h
a
z
a
rd
s
,
s
u
c
h
a
s
e
le
c
t
r
ic
a
lw
ir
i
n
g
,
c
o
n
d
u
its
o
r
p
l
u
m
b
i
n
g
,
co
n
ce
a
le
d
b
ehi
n
d
t
h
e
m
.
I
f
y
o
u
a
re
n
o
t
s
u
r
e
,
co
n
s
u
lt
ap
ro
fe
s
s
ion
a
lin
s
t
a
lle
r
b
e
f
o
r
e
y
o
u
p
ro
c
e
e
d
.
D
O
N
O
T
C
U
T
A
R
O
U
N
D
G
R
A
Y
A
R
EA
E
ng
li
sh
&
T
r
a
n
s
l
a
t
io
n
s
W
A
R
N
I
N
G
:
M
ak
e s
u
r
e
t
h
e
s
pot
c
h
ose
n
is
s
af
e
f
o
r
c
ut
t
i
ng
.
D
o
n
otc
u
t
t
h
r
o
u
g
h s
u
r
f
a
c
es
t
h
at
h
av
e
ha
z
a
rd
s
,
s
uc
h
as
e
l
e
c
t
ri
c
a
l
w
i
r
i
ng,
co
nd
ui
t
s
o
r
plu
mb
i
n
g,
c
o
nc
e
a
l
e
d
b
eh
in
d
t
h
e
m
.
If y
ou
a
r
e
n
ots
ur
e
,
c
o
n
s
u
l
ta
p
r
o
f
e
ss
i
o
n
a
l
i
n
s
t
all
e
r
be
fo
r
e
yo
u
pro
c
eed.
WA
R
N
I
N
G:
M
ak
esu
re
t
he s
p
o
t
ch
o
s
e
n
i
s
s
a
f
ef
o
r
d
r
il
li
n
g
.
D
o
n
o
t
c
u
t
t
h
r
o
u
g
h
s
u
r
f
ac
e
s
t
h
a
t
ha
v
e
h
az
a
r
d
s
co
n
c
e
al
edb
e
h
in
d
t
he
m,su
c
h
as
elec
t
r
ic
a
l
w
ir
i
n
g
,
c
on
d
uit
s
o
rplu
m
b
i
n
g
.
I
f
y
ou
a
r
eno
t
s
ur
e
,c
o
ns
u
l
t
a
p
ro
f
e
s
s
io
nal
i
n
st
a
l
l
e
r
be
fo
r
e
you
p
ro
c
e
e
d
.
W
A
RN
I
N
G
:
M
a
ke
sur
e
t
he
s
p
o
t
ch
o
s
e
n
i
s
s
a
f
e
f
or
d
ri
l
li
ng.
D
o
no
t
c
u
t
t
h
ro
u
g
h
s
u
rf
a
c
e
s
t
h
a
t
h
a
v
e
h
a
z
a
r
d
s
c
o
n
c
ea
l
e
d
be
h
i
n
d
t
he
m
,
s
uc
h
a
s
e
l
e
c
t
r
i
c
a
l
w
i
r
i
n
g
,
co
nd
u
i
t
s
o
r
pl
um
bin
g
.
I
f
y
o
u a
r
e
no
t
s
u
r
e
,c
on
s
u
lt
a
pr
o
f
e
s
s
i
on
a
li
ns
t
al
l
e
r
b
efo
rey
ou
p
r
o
c
e
ed
.
WA
RN
I
NG
:
M
a
k
e
s
u
r
e
th
e
s
p
ot c
h
o
s
e
n
i
s
s
a
f
e
f
o
r
d
r
illing
.
D
o
n
o
t
c
u
t th
r
o
u
g
h
s
urf
a
c
es
th
at
h
av
e
ha
z
ard
s
c
o
n
c
e
a
l
e
db
e
h
i
n
d
t
h
em
,
s
u
cha
s
e
l
e
c
t
r
ic
al
w
i
r
in
g
,
c
ond
u
i
tso
r
p
l
u
mb
i
n
g
.
I
f
yo
u
a
re
no
t
s
ur
e
,
c
o
n
s
ul
t
a
p
ro
fe
s
si
o
n
a
l
in
s
ta
ll
e
r
b
e
fo
r
e
y
o
u
p
r
o
ce
e
d.
W
AR
NI
NG:
Ma
k
e
s
u
r
e
th
e s
po
t
c
ho
s
e
n
i
s
sa
fe
f
or
dr
il
l
i
ng
.
D
o
n
ot
c
u
t
t
hr
ou
g
h
s
u
r
f
a
c
e
s
t
h
a
t
h
a
v
e
haz
ar
d
s
c
o
n
c
ea
le
d
beh
i
n
d
t
hem
,
s
uc
h
a
s
e
l
e
c
tric
al
wir
i
n
g
,
c
o
ndu
it
s
or
p
l
u
m
b
i
n
g.
I
f
y
o
u
ar
e
n
o
t
s
u
r
e,
c
o
nsu
l
t
a
pr
o
fess
i
o
n
a
l
i
n
s
t
a
l
l
e
r
be
fo
re
y
o
u
p
r
o
c
e
e
d.
W
A
R
N
I
N
G
:
M
a
k
e
s
u
r
e
t
he
spo
t
c
hos
e
n
i
s
s
af
e
fo
r
d
r
ill
ing
.
D
o
n
o
t
c
utt
h
r
o
u
g
h
s
u
rf
a
c
e
s
t
h
a
t
h
a
v
e
h
a
z
a
r
d
s
c
o
nc
e
a
l
ed
b
e
h
in
d
t
h
e
m
,
s
u
c
h
a
s
e
l
e
c
t
r
i
c
a
lw
i
ri
n
g
,
c
on
d
u
i
t
s
o
rpl
u
m
b
in
g.
If
y
ou
a
r
e
n
o
t
s
u
r
e,
c
o
ns
u
lt a
p
r
o
f
e
s
s
i
o
n
ali
n
s
t
al
l
e
r
b
e
fo
r
e
y
ou
pro
c
ee
d.
W
A
R
N
I
N
G
:M
a
k
e s
ur
e
t
h
e
s
p
o
t
ch
o
s
e
n
i
ssa
f
e
f
o
r
d
ri
l
l
i
n
g
.
D
o
no
t c
u
t
t
h
r
o
ug
h
su
r
fa
c
e
s th
a
tha
ve
h
a
z
ar
d
s
c
on
ce
al
e
d
be
h
i
n
d
t
h
e
m
,
s
u
c
h
as
e
le
c
t
r
i
c
a
l
w
i
ri
n
g,co
n
d
u
it
s
o
r
p
l
u
m
b
i
n
g
.
If
y
o
u
a
re
n
o
t
su
r
e
,
c
ons
u
l
t
a
p
r
o
f
es
s
iona
l
in
s
t
a
l
le
r
b
e
f
o
re
y
ou
p
r
o
c
e
e
d
.
9"
(
22
.9
c
m
)
T
A
PE
H
ER
E
T
r
a
n
s
l
a
t
i
o
n
s
b
e
l
o
w
T
A
PE
H
E
R
E
T
A
P
E
H
ER
E
D
O
N
O
T
C
U
T
A
RO
U
N
D
G
R
A
Y
A
RE
A
D
O
N
O
T
C
U
T
A
R
O
U
N
D
G
R
A
Y
A
R
E
A
D
O
N
O
T
C
U
T
A
R
OU
N
D
G
R
A
Y
A
RE
A
D
O
N
O
T
C
U
T
A
R
O
U
N
D
GR
A
Y
A
RE
A
D
O
N
O
T
C
U
T
A
R
O
U
N
D
G
R
A
Y
A
R
E
A
D
O
N
O
T
C
U
T
A
R
O
U
N
D
G
R
A
Y
AR
E
A
D
O
N
O
T
C
U
T
A
R
O
U
N
D
G
R
A
Y
A
RE
A
(b)